Dashr Motion is an IMU (inertial measurement unit) that can be used for a variety of drills/tests in the Dashr ecosystem. One core application is VBT or Velocity Based Training.
Like other Dashr technologies, the Motion sensor connects in the Dashr app. When used for VBT it will present metrics such as average and peak bar velocity.

Step 1: Charge your Motion device
Use the charging brick and cable to charge your Motion device(s) before using them.
Step 2: Install the Dashr app Install the Dashr app and create a coach account if you do not already have one.
When you first log in to the app you will be asked to allow Bluetooth and Location Services. To properly use Bluetooth to connect to Dashr devices you need to enable both. You can access these settings at anytime by going to your phone or tablet’s settings > apps > Dashr.
Step 3: Register your Motion device
Once in the app go to the Testing tab at the bottom left then Register Devices. Press the “Scan for Devices” button and firmly press the button on your Motion device.
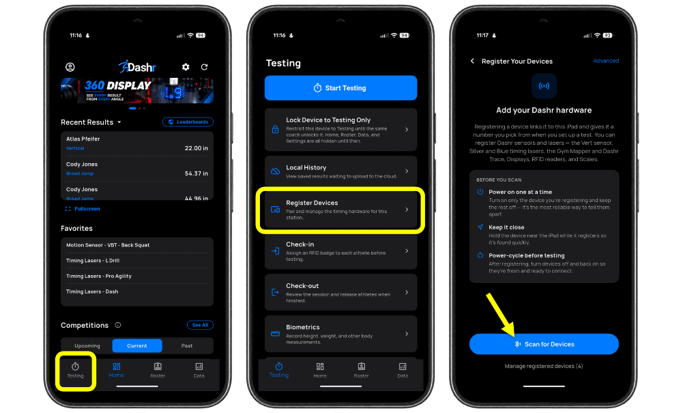
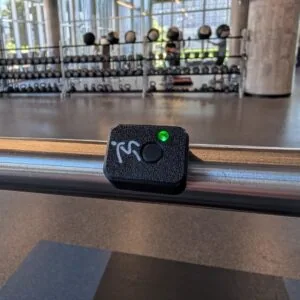
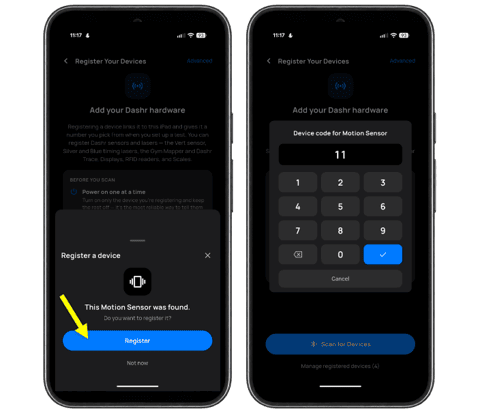
When the device turns on the indicator light will flash green and it will pop up as an available device. Select it in the app and assign it a number of your choosing. Write that number on the back of the Motion sensor.
NOTE: To power off the device, hold down the power button for ~3 sec. The light will go solid and then turn off when you let go of the button.
Step 4: Track your Lifts
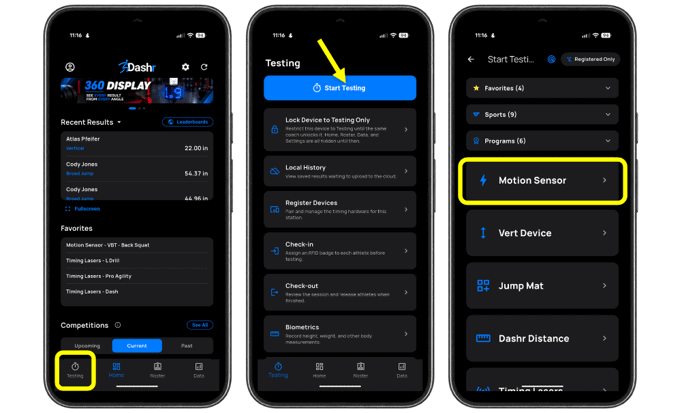
To get to VBT, go to the Testing tab at the bottom left the press the “Start Testing” button at the top of page. Scroll down to the “Motion Device” section on the page and you will see the “Velocity Based Training” drill. Click on it and it will take you to a list of lifts.
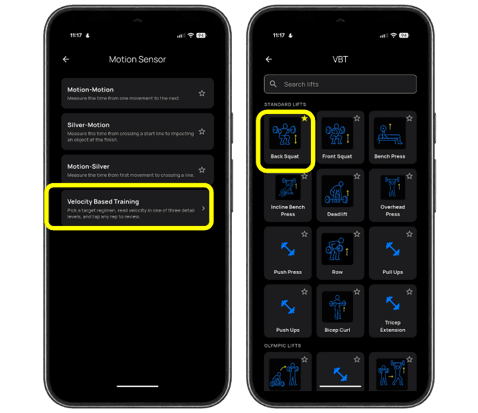
Select the appropriate lift and it will take you to the connection page, just like your lasers. Note that if you press the star to the right of the lift it will favorite the VBT lift and move it to the top of the list of drills.
With the Motion sensor on, press the red “Required” button to the right of where it says Motion Sensor. This will present a list of Motion sensors you have registered, select the one you are using and press connect.
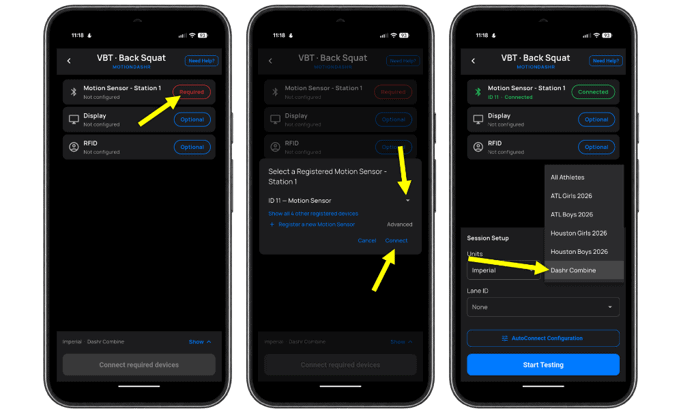
Once connected you can select your roster and Start Testing.
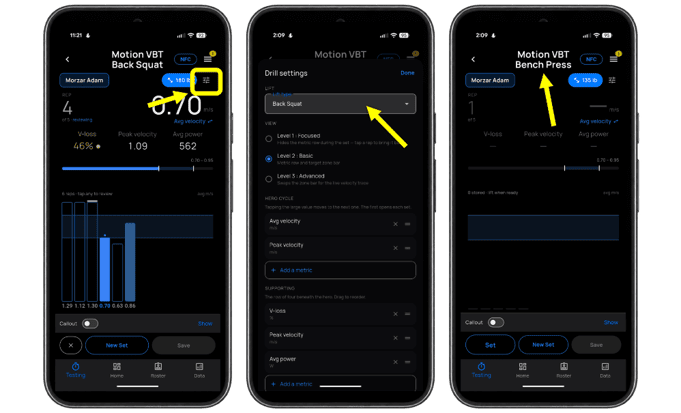
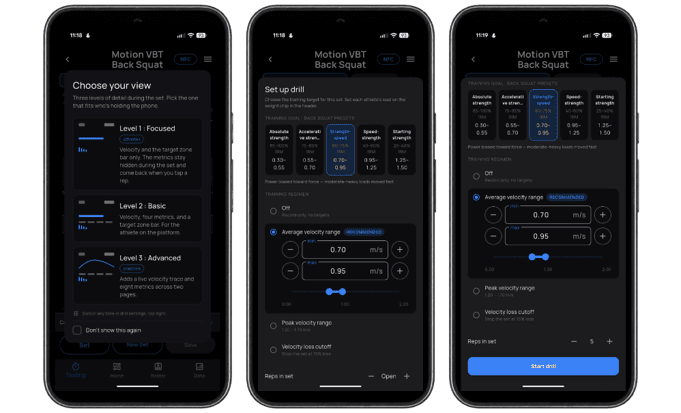
Next you will be prompted to select your view. There is super simple, just a single number, to a more advanced display of metrics. If you make your select and click “Don’t show this again”, we will save your selection. You can always change this view once you are testing.
Now, if desired, you will select a training goal based on average or peak velocity, or velocity cutoff. You can also turn this off if you are just tracking reps and do not care about this feedback.
Finally, you can set a number of reps if you would like and press Start drill to get going.
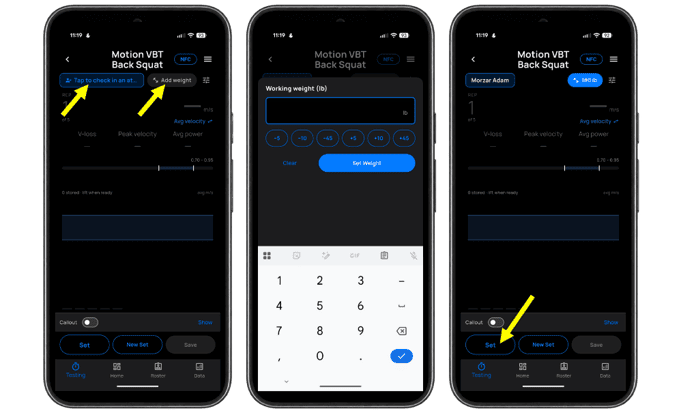
Select the athlete, add a weight, and press set to begin!
Your athlete can now do the set. Each rep is recorded and at the end of the set you can save it. If saved it saved locally on the device and sent to your online Dashboard so you can keep up with every rep! If the athlete is connected to your account, these sets are sent directly to their app as well.
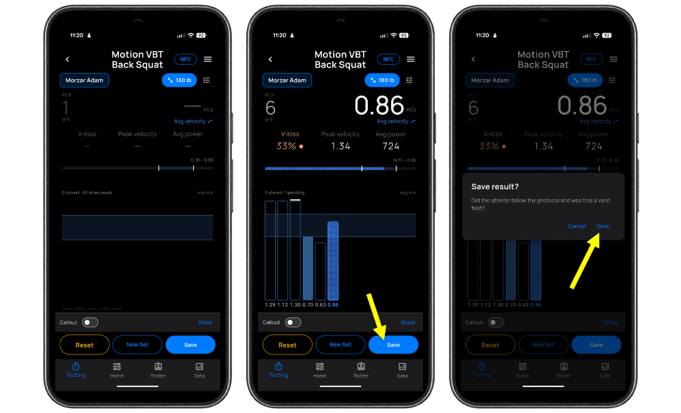
Select any rep in the set to see details about it. Click on the large Avg number to toggle it to Peak velocity. Long press on a rep to delete it if you want to exclude it from the set.
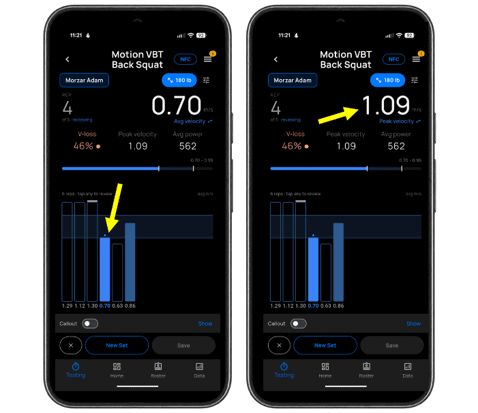
Check-in the next athlete or switch to a different lift. If you press the drill menu button next to the weight, you can switch lifts without needing to reconnect the Motion device and change what you see on the screen.