We have a MASSIVE update on Dec 22, 2025 with new features and improved work flow to more effectively manage your rosters and athletes. We are working on releasing this in iOS as well and will update you when that is available.
- New header on the main page – Quickly create rosters, add athletes, access roster invite codes, and register equipment.
- Record a video of your drill – You can now record a video while testing!
- View recent results – The last 3 reps are displayed on the testing screen.
- Audible announcements – You can have your phone automatically say the result out loud after each rep.
- All results saved – Results will be saved locally to history even if no athlete is checked-in.
- Streamlined athlete check-in – New interface to quickly assign Badge IDs and other identifiers.
New Header
There are now buttons to add an athlete, manage rosters, and add device (lasers, displays, etc.) at the top of the main page.
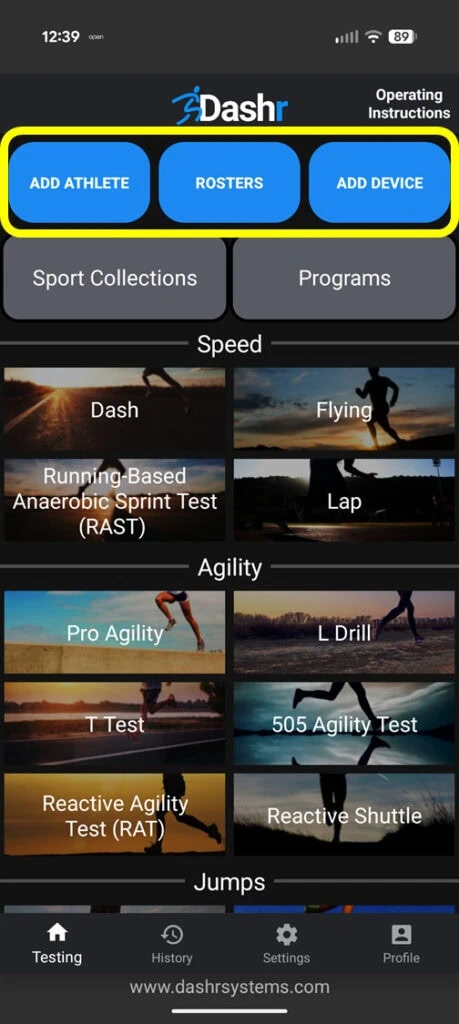
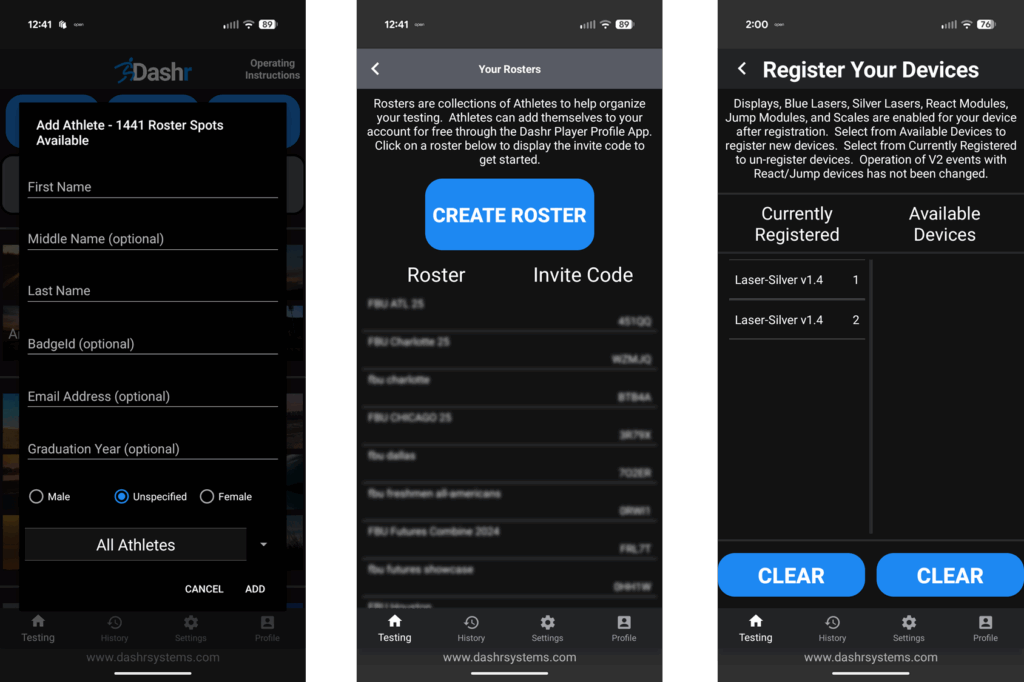
Clicking on “ATHLETES” will allow you to add an athlete. “ROSTERS” allows you to add a roster on the fly and view roster invite codes so athletes can join your roster for free using the Player Profile App. And the “ADD DEVICE” button gets you to the registration page to register your equipment.
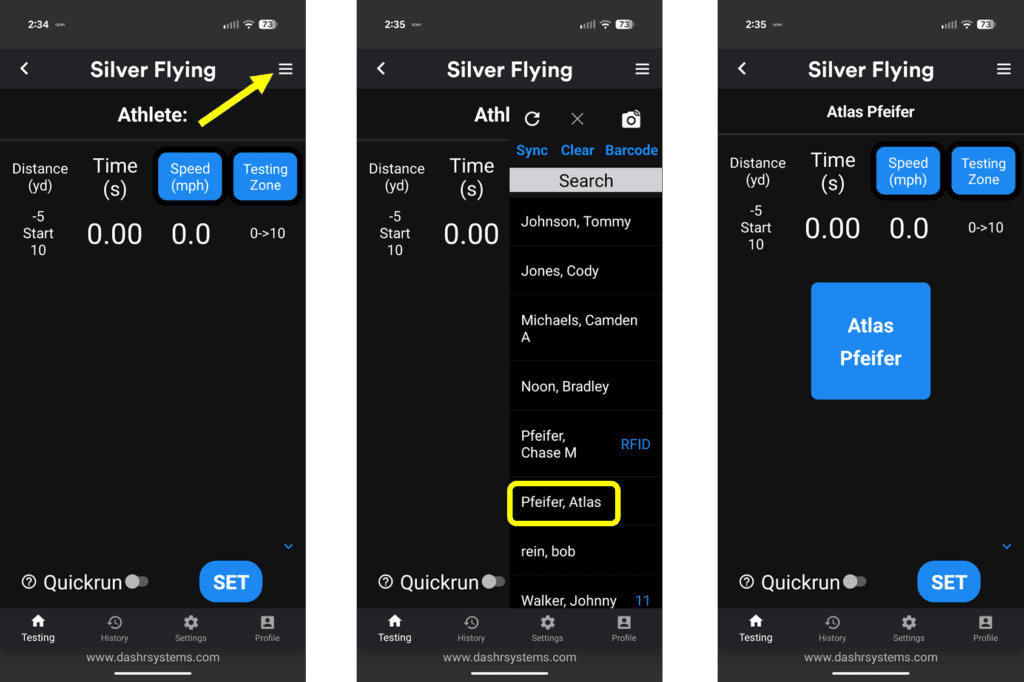
If you have not saved results for your athletes through the Dashr system before, you simply press the 3 bar menu button at the top right of the testing page to select your athlete. Check out our Dashboard Operation Tips & Tutorials to get the full rundown of how to use all our online Dashboard features.
Video Capture
You can now record the drill, while timing it! The video is automatically cut to begin right before the clock starts and end shortly after it is completed. The name of the athlete and the result is added to the end of the video.
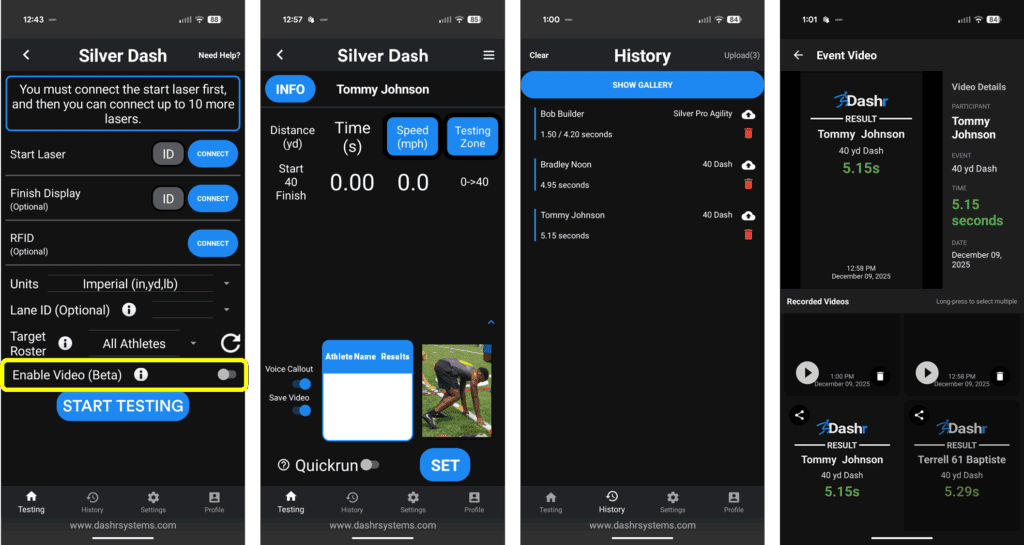
If you would like to use this feature, there is a toggle to turn it on through the connection page. Once on the testing page you will see the thumbnail of what your camera sees. There is a toggle here to select if you want to save it or not (maybe you do not want to save it for every rep) and you can minimize this whole section by pressing the blue carrot just above the image.
To access your videos, go to the History tab. You will see your results along with a button that says “Show Gallery”. If you click on this button it will take you to your videos. These are saved locally on the device can you can share or export them using the share icon and you can delete them using the trashcan icon.
Recent Results and Audible Announcing
The last three results for the drill you are running can now be displayed on the testing screen so you have quick access to them without needing to go to the history tab.
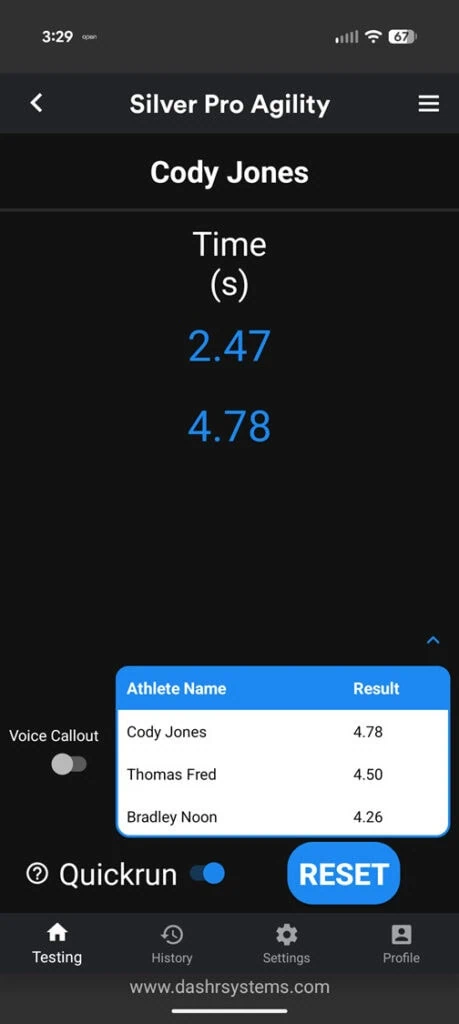
There is a “Voice Callout” toggle to the left of this table, if you toggle that on your phone will read out the name of the athlete and the result twice. If there is no athlete checked in, it will just say the result.
If you do not want to use this, you can minimize it all by pressing the blue carrot above the table.
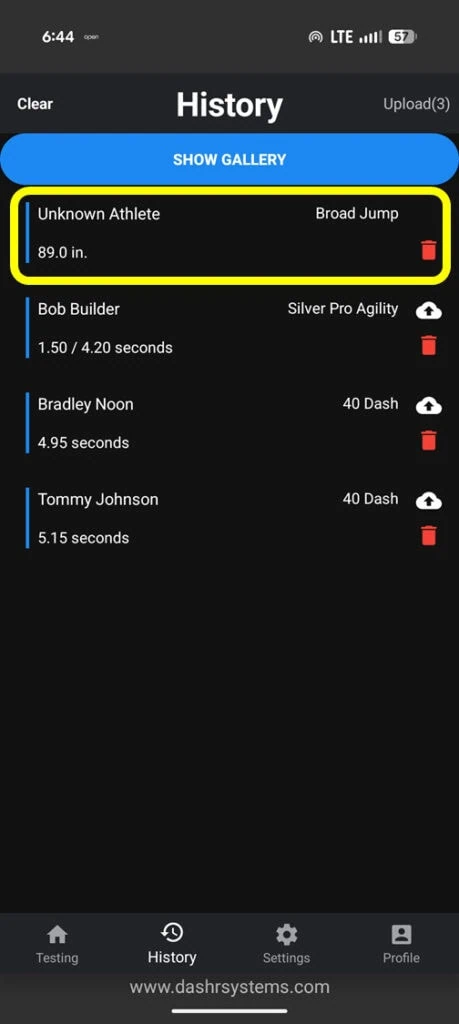
Saving All Results
While the most efficient method of testing would to be use Roster Spots and/or the Player Profile App, we realize that in some situations you may be testing a couple athletes at a time without the need to save the results for use outside of the session. Based on users feedback we have now expanded the History to include “Unknown Athletes”. You can view all of your attempts in one place.
Remember that the number of athletes added to your account is unlimited and free if you use the Player Profile App to manage and distribute results.
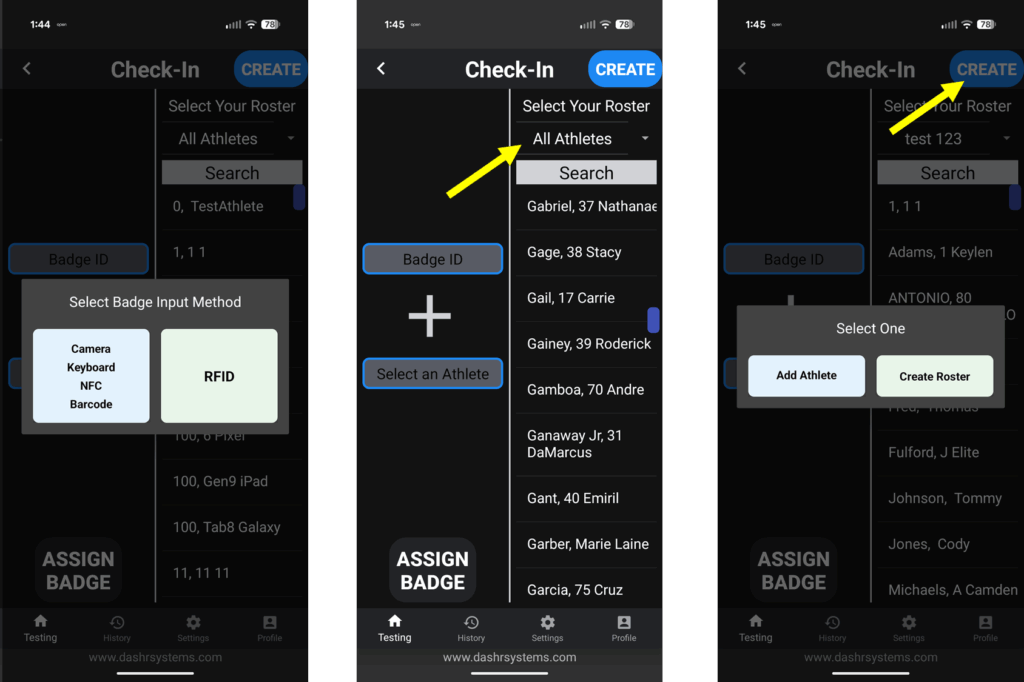
New Check-in Page
If you are assigning your athletes a BadgeID, barcode, RFID, or NFC (NEW) to check them into a drill – we have just made that much easier. To get to the Check-In page scroll down on the main page and select the “Check-In” tile.
When you first enter the page it will ask you your input method, if it is RFID then you will power on your RFID module and press the RFID button. Once that selection is made you will see that you need to add a Badge ID and select an athlete. Add the Badge ID by entering a number or scanning your RFID/NFC band. Then select your athlete.
Note that if you have a lot of athletes you can search for the athlete and/or filter by roster so you do not have to search through all of you athletes. Pressing the “Create” button allows you to add an athlete or create a roster right there on the fly.
Once the Badge ID and athlete are provided, press the “Assign Badge” button to assign it and repeat as necessary. Note that once a Badge ID is assigned to an athlete it will stay assigned until that ID is assigned to a different athlete.