
THIS FEATURE IS IN DEVELOPMENT AND WILL BE RELEASED TO THE PRODUCTION APP VERY SOON.
The Queue allows you to run multiple athletes at once through the same set of timing gates. As long as the athletes start and stop the drill in the same order – there is no limit to the number of athletes that can be timed.
*Note that this feature is not available with the 2.0 system
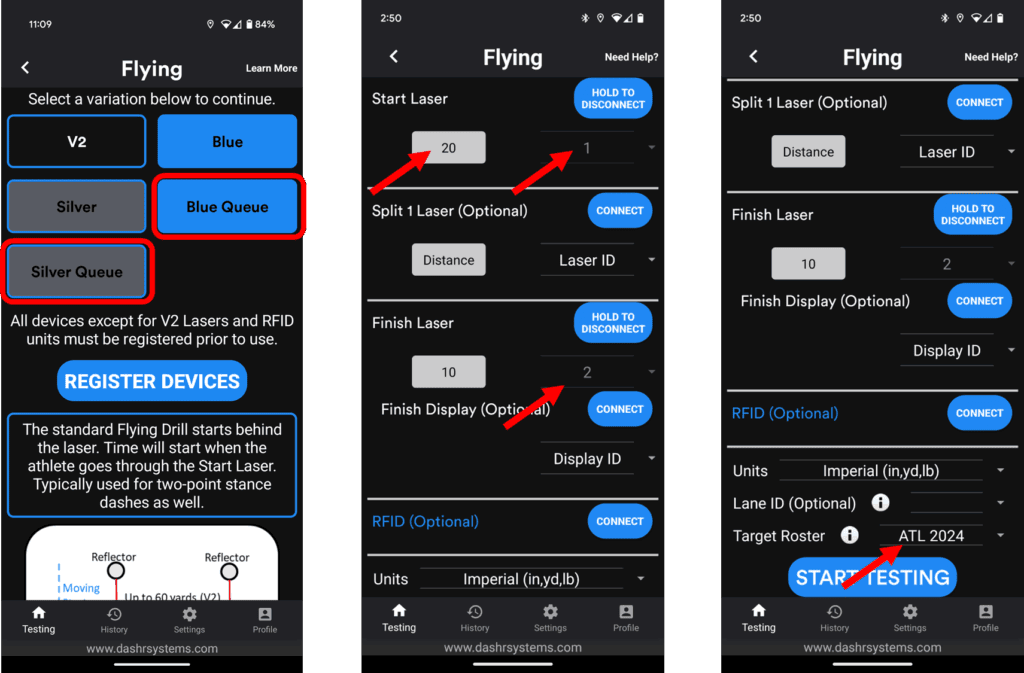
To get to the Queue feature, go to a queue enabled drill – we are first releasing this with the Flying drill but we plan to add it will be added to the Dash and Lap drills as well. After selected Queue option (Silver or Blue) it will take you to the connection page. Connect the lasers and enter the distances just like you do with other drills.
In order to make it as efficient as possible, make sure the athletes you are testing are added to a roster and select that roster before hitting “Start Testing”.
Once in the drill you will need to select the athletes you want to test. Select the menu at the top right and select the athletes one at a time, in the order that you would like them to run. You can also press the Add Entire Roster button to add everyone on the roster at once. Note that the order of the roster is alphabetized by the athletes’ last name. If you add the entire roster it will then ask you how many reps you want. So if you want 2 reps it will run through all the athletes twice.
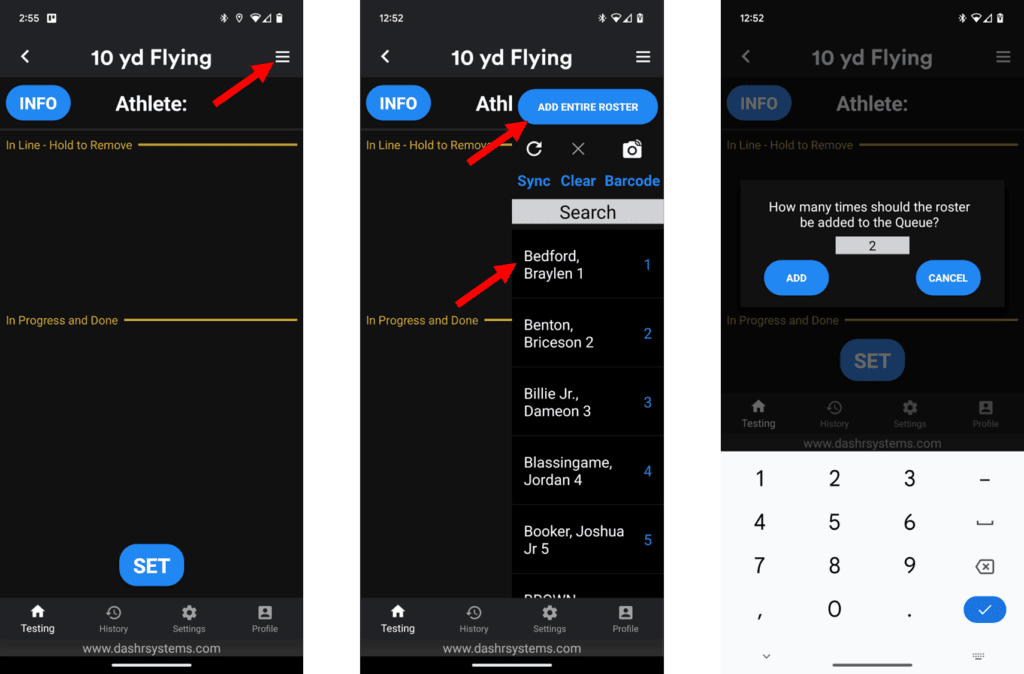
Now the athletes will show up in the top “In Line” section. The number in front of their name indicates the order of who is next. If one of the athletes on your roster is not there that day, you can long press on their name to remove them from the list. Note that you can also scroll this list.
When you are ready to begin, press the Set button. Now when an athlete crosses the starting gate their name will move from the In Line section to the In Progress and Done section. When they cross the finish gate their time will appear. If you need to pause the testing, pressing the Pause button will disable the starting laser until you un-pause it.
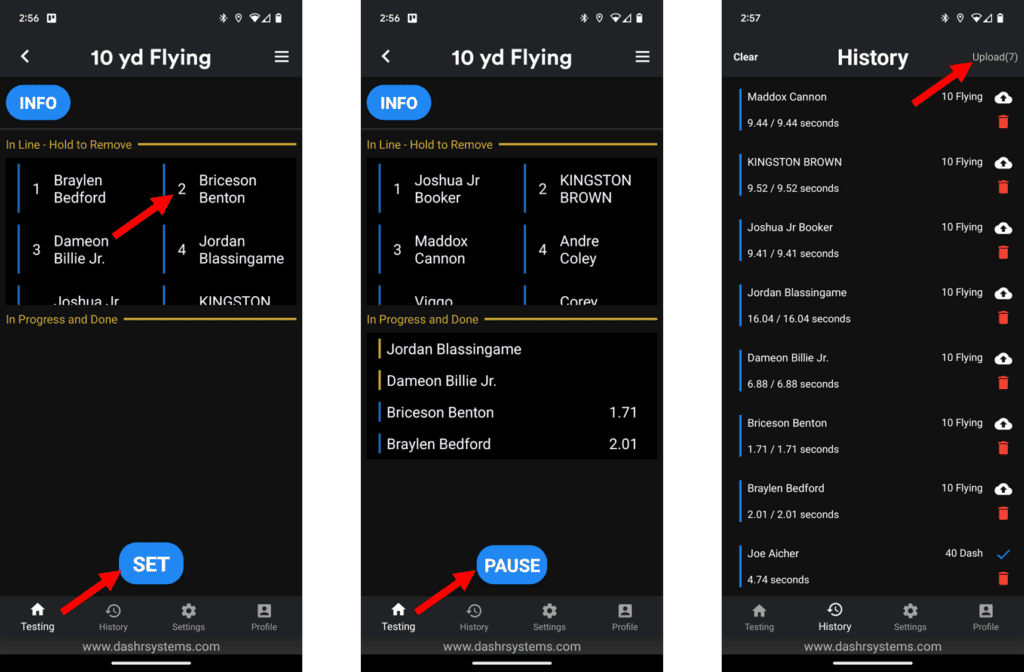
Given the rate at which results can be collected here, results are not automatically sent to the dashboard. Once your testing is complete, go to the history tab and you will see all of the results right there. If there are any you would like to delete, you can do that before uploading. When you are ready to upload, press the Upload button at the top right. Note that the parenthesis indicate the number of results that you have in your history that have not been uploaded. Pressing the Upload button will upload all of those results.