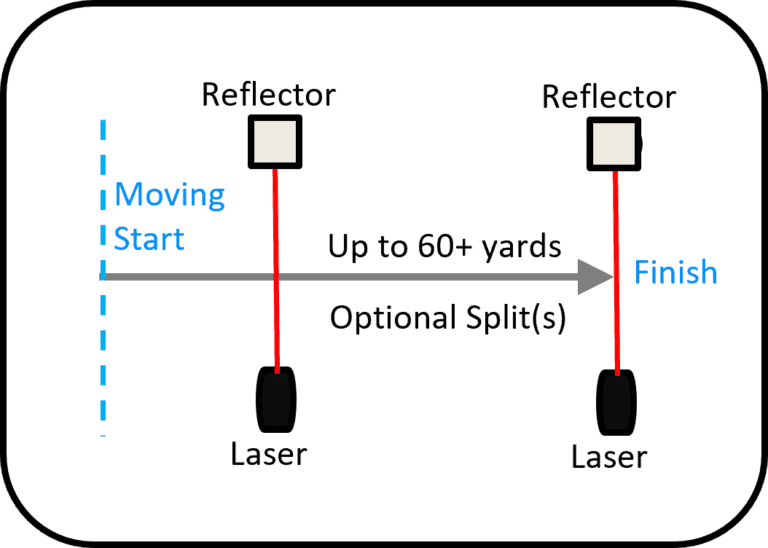
The Flying drill is a time/speed measure from point A to point B with optional splits in-between. Note that a Fly uses a moving start and requires 2 timing gates.
Step-By-Step Instructions
- Install/prepare batteries in each laser you plan to use.
- Install/open the Dashr app on your phone or tablet. (Create an account here if you have not already)
- Register each laser in the app (video below) – Press the “+” button at the top left of the main page or navigate to the “Device Registration” tile. Power on the lasers one at a time and select them from the “Available” list and assign them a number. Write that number on your laser. (This only has to be done the first time you use the laser with this phone/tablet)
- Return to the home menu and select the Flying drill.
Select your timing equipment:
Dashr | Blue
- Screw each laser onto a tripod. Under standard use, you should use taller tripods for all lasers and reflectors so that the beam is around hip height. For visual instructions of attaching lasers and reflectors to tripod and setting up the gate, please check out Laser & Reflector Set-up.
- Screw a reflector onto a matching tripod and position laser and reflectors across from each other (~6 ft) to create a line to pass through. Place finish laser within 120 yards of the start laser, with optional splits in between.
- With the lasers on, select the appropriate laser from the drop-down menu and press the “Connect” button. If it does not work the first time, repeat.
- Enter in the distance for each laser when possible, this allows for speed calculations. (Imperial and metric unit toggle at the bottom)
- Once all devices are connected, press the “Start Testing” button.
- Check in the appropriate athlete (details here) – optional.
- With QuickRun on, move through the starting gate to begin timing (time will turn blue – indicating that timing is taking place), and you get a result when you cross the next gate.
- With QuickRun off (option in settings) you will see “Set” and “Reset” buttons to give you control of when a test starts. Press “Set” once the athlete is ready to take off. Press “Reset” to clear the time for the next athlete.
For 2-point starts we typically suggest using the Flying drill. For 3-point starts we recommend the Dash drill See demonstrative video below.
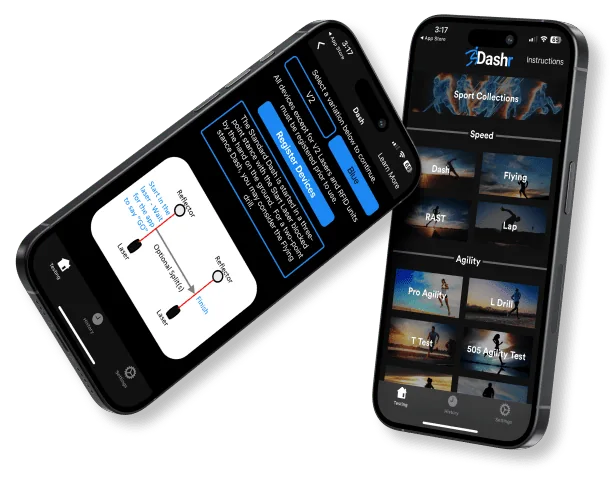
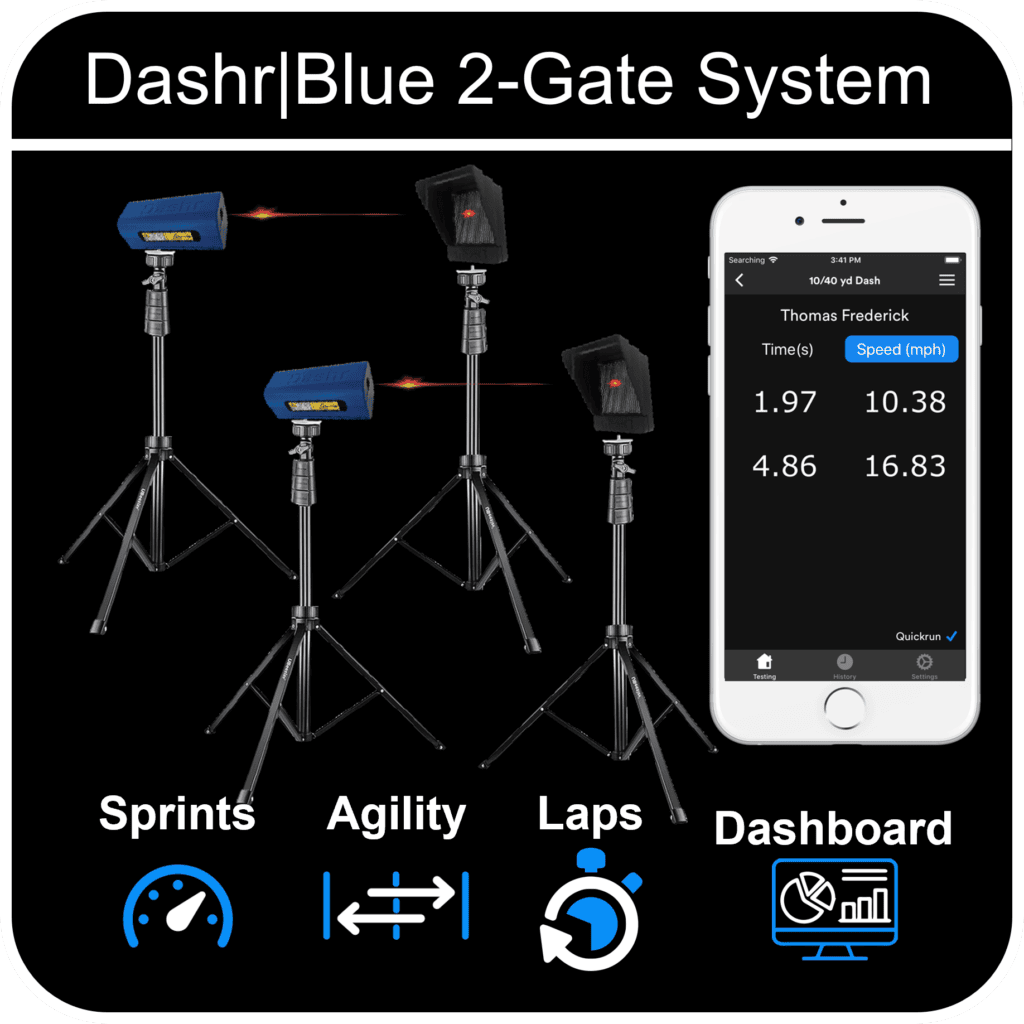
Dashr | Silver – Coming Soon!
- Each laser comes on a mini tripod angled up. Take one out of the case and place it on the ground where you are running the drill.
- Power it on with a USB battery/cable.
- With the laser on, select the starting laser from the drop-down menu and press the “Connect” button. If it does not work the first time, repeat. See video above for reference, Silver connection and operation is very similar to Blue.
- Once the first laser is connected you will see options for split and finish lasers. If you add a split, another split option will appear. Once you connect the finish laser you can procede.
- Once all devices are connected, press the “Start Testing” button.
- Check in the appropriate athlete (details here) – optional.
- With QuickRun on, move through the starting gate to begin timing (time will turn blue – indicating that timing is taking place), and you get a result when you cross the gate again.
- With QuickRun off (option in settings) you will see “Set” and “Reset” buttons to give you control of when a test starts. Press “Set” once the athlete is ready to take off. Press “Reset” to clear the time for the next athlete.
- Check in the next athlete and keep it rolling!