Vertical Jump / Max Vertical

Dashr enhances the classic vertical jump test, a century-old measure of lower body power. Capture and analyze jump data effortlessly, either through smart technology options or manual input on the Dashr App.

Drill Instructions

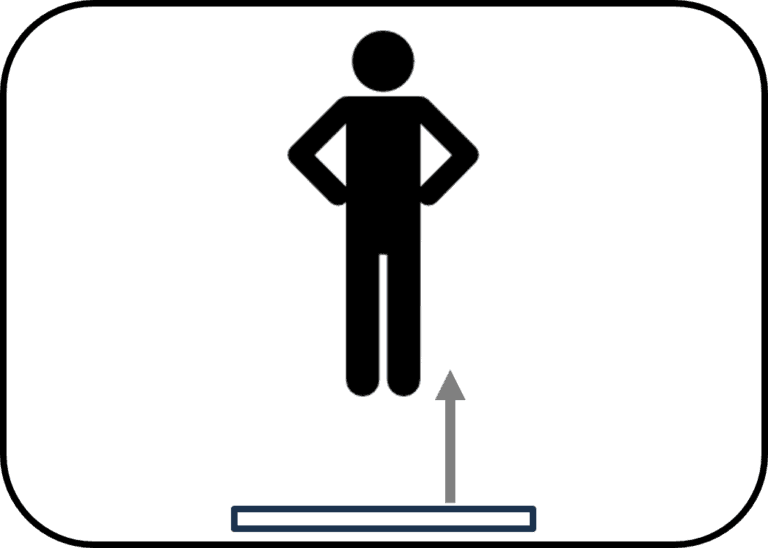
The vertical jump test is a test of lower body power and has been performed for over 100 years!

There are two different ways to measure vertical jump using Dashr:

  1. Dashr|Jump Mat System NEW – Use the Dashr|Jump Mat to capture vertical jump and max/approach vertical. Pure flight time can be used, or you can increase accuracy by accounting for vertical movement due to plantar flexion before leaving the ground (details on this HERE).
  2. Dashr Laser Vertical – which uses a Dashr laser like a jump mat to calculate the vertical jump based on flight time. Click HERE for instructions on how to use the Dashr Laser Vertical.
  3. Dashr|Jump with a Vertec or similar vane-based jump measurement device. This uses the traditional touch height minus reach to calculate the vertical. See below for instructions on how to use this.

Jump Mat testing with Dashr

  • For this drill you will need the Dashr|Jump Mat System. In the package you received there is a Jump Mat, Jump Mat Controller, USB battery, power cord, and charging brick.
  • Install/open the Dashr app on your phone or tablet. (Create an account here if you have not already)
  • Connect the USB battery to your Jump Mat Controller using the cable provided, this will power it on. Use the button on the battery to power it off/on.
  • Connect the Jump Mat Controller to the Jump Mat by inserting the barrel jack from the Jump Mat into the receiver on the Jump Mat Controller. Note that the other female barrel jack cord on the Jump Mat is for if you want to connect additional mats.
  • Register your Jump Mat Controller in the app – Navigate to the “Device Registration” button at the bottom, power on the Jump Mat Controller and select it from the “Available” list and assign it a number. Write that number on your device. (This only has to be done the first time you use the device with this phone/tablet)
  • Return to the home menu and select Vertical Jump, then Jump Mat.
  • With the Jump Mat Controller on, select the number you assigned it (in registration) from the drop-down menu and press the “Connect” button. If it does not work the first time, repeat.
  • Once all devices are connected, press the “Start Testing” button.
  • On the testing page you will see options for vertical or approach vertical, as well as what we consider traditional and more accurate calculations based on flight time. Select the options you would like to test with.
  • Check in the appropriate athlete (details here) – optional but STRONGLY suggested for this drill.
  • For standing vertical, have the athlete stand on the mat. Press the SET button and you will get a GO message. Have them jump and land on the mat – both a flight time and vertical distance will be presented.
  • For approach/max vertical, press the SET button when they are ready. Once pressed they can approach the mat with their 2-3 step approach (your preference) and perform the vertical while landing on the mat. Both a flight time and vertical distance will be presented.
  • Check in the next athlete and repeat!

Vane-Based Vertical Testing with Dashr|Jump

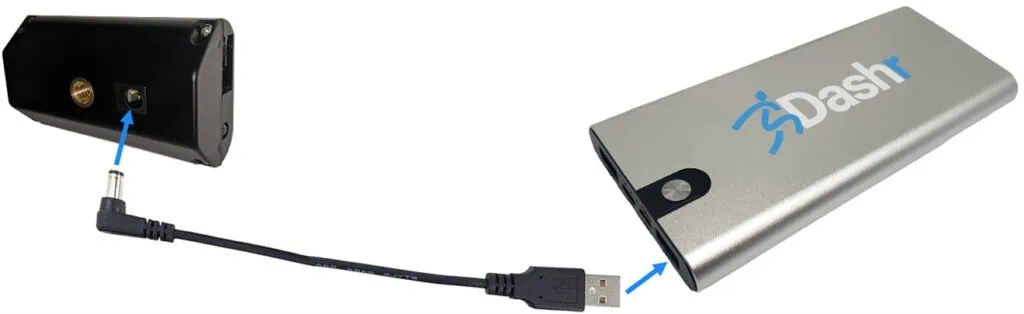
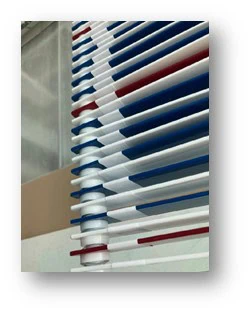
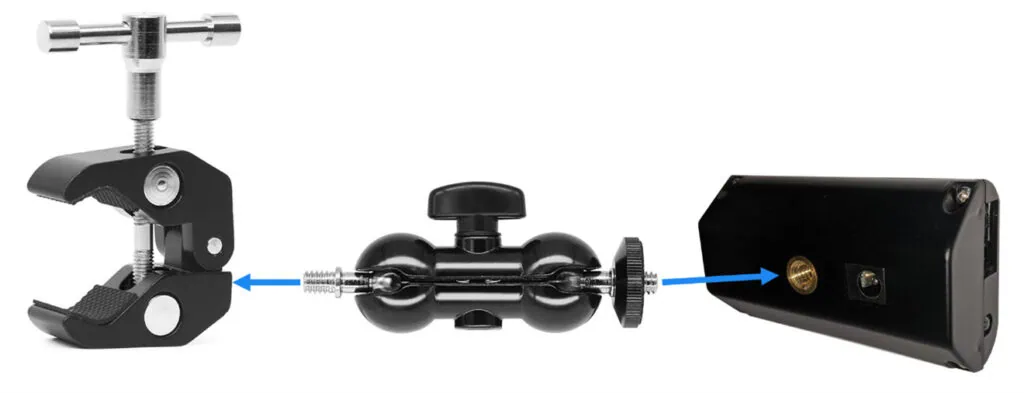
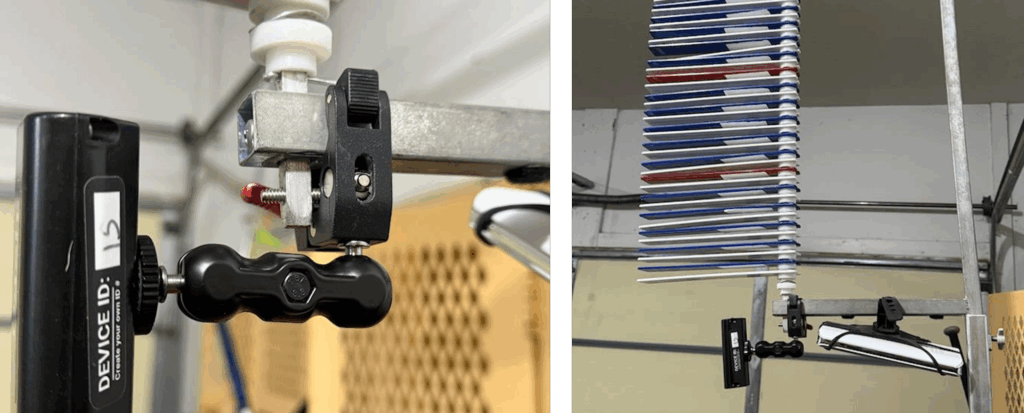
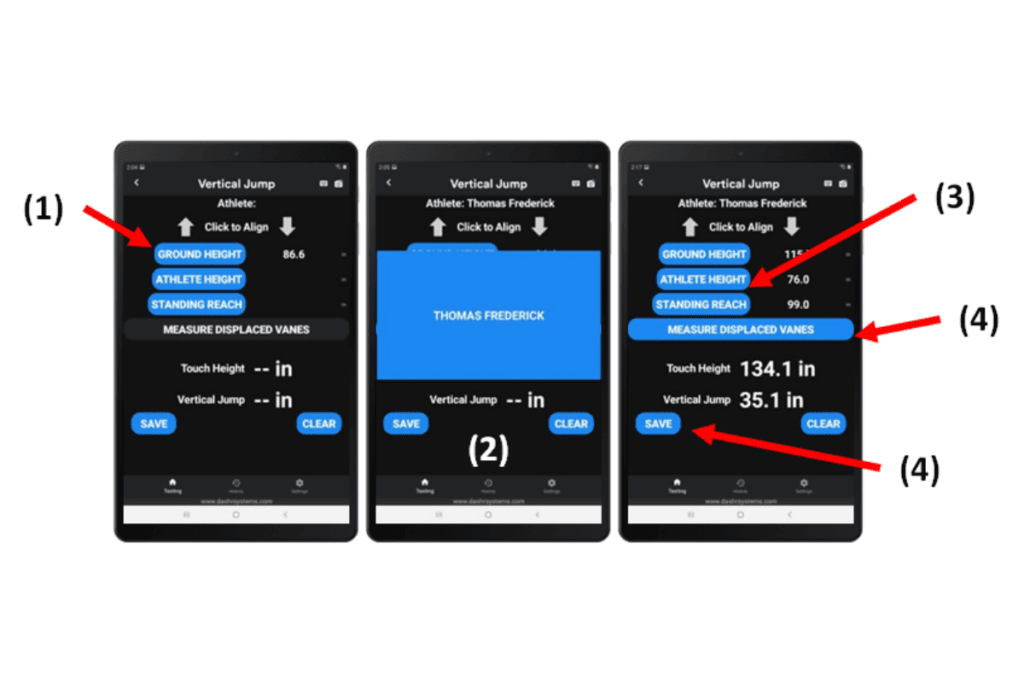
When using Dashr|Jump hardware for this test you will need a Vertec or similar vane based system, and we will make it smart! You can also manually enter jump measurements into the Dashr app.
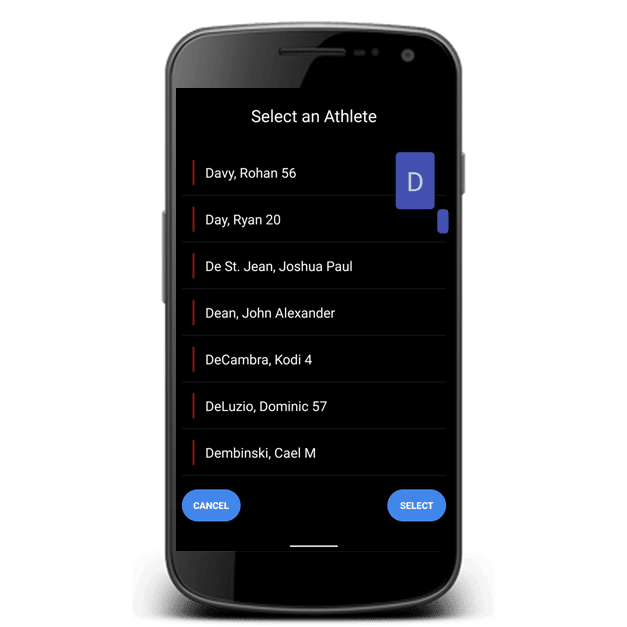
Set-up Instructions

  • In the package you received there is a Jump module, USB battery, power cord, mounting clamp with a dual ball joint, clipboard, white stickers, mini tripod + ball joint, and a user/installation manual. Follow the instructions for setting up the system – installing the jump device on your Vertec and applying the stickers. Note that your manual may not have updated device registration instructions for the new app – the instructions below cover these changes.
  • Install/open the Dashr app on your phone or tablet. (Create an account here if you have not already)
  • Register your Jump Module in the app – Navigate to the “Device Registration” tile or press the +Device button at the top left. Power on the Jump device by connecting it to a USB battery using the USB A-barrel jack cable. Note that the battery should power on automatically when plugged in, but a quick button press will turn it on and a long press will turn it off.
  • Select the Dashr Jump device from the “Available” list and assign it a number of your choosing. Write that number on your device. (This only has to be done the first time you use the Jump device with this phone/tablet)
  • Now lets install the tech onto your vane based jump station.

Installing the Jump device on a Vertec/vane based station

  • Start by placing the white stickers on each vane of the jump station. Stick them ~1/2 inch away from the post. The laser will hit these stickers and it will ensure a consistent surface for measurement.
  • Connect the clamp and dual ball joint by screwing the threads of the dual ball joint into the clamp, then screw the black Jump Module onto the treads extending from the ball joint.
  • Tighten the clamp onto the jump station near the base of the vanes and use the dual ball joint to orient the Jump Module under the vanes in a vertical orientation. Note that the LED on the Jump Module should be pointed down.
  • Use the battery strap to attach the battery to the jump station. Select a location that works best for you.

Operating the Jump Station

  • Return to the home menu of the Dashr app and select Vertical Jump then Jump Device.
  • With the Jump module on, select the number you assigned it (in registration) from the drop-down menu and press the “Connect” button. If it does not work the first time, repeat.
  • Once all devices are connected, press the “Start Testing” button.
  • Use the align toggles (arrows) to make sure your device is shooting straight up at the vanes. Adjust the ball joint as necessary (loosen then tighten the knob on the side) if it needs to be realigned.
  • (1) Calibrate the device by placing the clipboard on the ground, under the laser (use the alignment toggle if necessary), and press “Ground Height”. This will measure the distance the device is from the ground.
  • (2) Check in the appropriate athlete (details here) – optional but STRONGLY suggested for this drill.
  • (3) If you already have saved height and reach data for the athlete you checked in, those measurements will appear on the screen. If you have not taken those measurements, instruct the athlete to stand under the Jump module and place the clipboard on his or her head – then press the “Athlete Height” button. Then have them reach as high as they can, reaching for the bottom of the Jump module, and place the clipboard on the tips of their fingers – press the “Standing Reach” button. Note that you many need a box or stool to reach the athlete’s fingertips.
  • (4) Have the athlete perform their vertical jump, hitting the highest vane they can. Once complete, clear all touched and surpassed vanes – then press “Measure Displaced Vanes”. You will get a vertical result and hit the “Save” button to save it.
  • Repeat Steps 2-4 for each athlete you test.
Vertical jump.
Dashr is so much more
than a laser timer.

More than state-of-the-art testing equipment, Dashr is an ecosystem that connects your athletes, teams, equipment and outside software like nothing else.

Check out this overview to learn how to get the most from your Dashr system.